Installing Telstar
It is recommended that Telstar is installed into a Docker environment. The required images are available from https://hub.docker.com/repository/docker/johnnewcombe/telstar. The following examnple commands can be used to install and run Telstar. In addidion examples are also given for orchestrating the services using both Docker Compose and Kubernetes.
To run Telstar using Docker, a minimum of two Docker images are required.
- The official Docker image mongodb
- The Docker image telstar
In addition, a Docker network will need to created to allow the images to communicate, and a Docker volume is desirable to allow for configuration changes and the addition of plugins.
Create the Docker Network and Volumes
The Docker network is used to allow communication between the TELSTAR application and the mongo database. The volumes provide a means to persist configuration data, plugins to be added and the mongo databse itself.
The following commands will create the resources required.
   $ docker network create telstar-network
   $ docker volume create telstar-volume
   $ docker volume create mongo-volume
Pull the Images and Run the Containers
Pull the required images as follows.
   $ docker pull johnnewcombe/telstar
   $ docker pull mongo
Please note that the tag used with the official mongo image may need to be set to the system architecture that is to be used. Please see https://hub.docker.com/_/mongo.//
There are several ways to run the TELSTAR application, this example uses simple Docker commands. See Orchestrating Telstar with Docker Compose and Orchestrating Telstar with Kubernetes sections for other examples.
Start the mongodb container and connect it to the previously created network using the command below.
Please note that the '--name' parameter is important as it is used as part of the database connection string from the TELSTAR container.
$ docker run --name telstar-mongo --network telstar-network -v mongo-volume:/data/db -d -e MONGO_INITDB_ROOT_USERNAME=mongoadmin -e MONGO_INITDB_ROOT_PASSWORD=secret mongo
The Docker run command can be used to start the Telstar container and connect it to the previously created network. Note that in the example below the internal port is specified as 6512 and that this is mapped to the same port on the host system. This is also specified at the end of the command to inform TELSTAR that this is the port to listen on.
$ docker run --rm -d --name telstar-server --network telstar-network -p 6512:6512 -v telstar-volume:/opt/telstar/volume johnnewcombe/telstar server --port=6512
In order to add some example content to the system, the init parameter can be used as in the example below.
$ docker run --rm --name telstar-server --network telstar-network johnnewcombe/telstar --init
If the --init switch is used as in the example above, the service will be running with some example content (see Example Content) and can be accessed using a suitable client.
The simplest way to test the system from a desktop machine is to use Telnet. TELSTAR is not a Telnet application but telnet can be used to provide a sanity check e.g.
$ telnet <ip-of-docker-host> <port-used-for-telstar>
If the system is working, a display similar to the following would be shown.
   Connected to glasstty.com.
   Escape character is '^]'.


   20201128T1316Z
   L             TE
    ST
   Welcome

   $$$$$$$$$$$$$$$$$$$$$$$$$$$$$$$$$$$$$$$
            Welcome to theTELSTAR
              videotex service.

        You are connected toELIOT.
   $$$$$$$$$$$$$$$$$$$$$$$$$$$$$$$$$$$$$$$
   ...
The screen looks a little garbled simply because TELSTAR is a videotex application not a Telnet application.
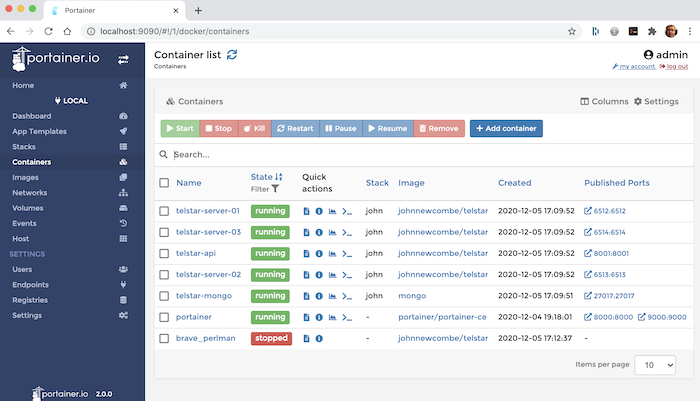
Portainer
The Docker environmemnt can be managed using Portainer, see Managing Telstar with Portainer.
